All Categories
Featured
Table of Contents
- – Remodeling Rv Diamond Bar, CA
- – OCRV Center
- – Replace Rv Flooring Diamond Bar, CA
- – Awnings For Trailers Diamond Bar, CA
- – Rv Sofas Diamond Bar, CA
- – Rv Dinette Table Diamond Bar, CA
- – Rv Sofas Diamond Bar, CA
- – Remodeling Rv Diamond Bar, CA
- – Rv Sofas Diamond Bar, CA
- – Replacement Rv Windows Diamond Bar, CA
- – Rv Restoration Companies Diamond Bar, CA
- – Rv Couch Bed Diamond Bar, CA
- – OCRV Center
Remodeling Rv Diamond Bar, CA
The good news is, with a sleeper sofa you don't have to choose in between a confined room, resting on the bed or resting on the sofa.
The big deal about residential vs. "RV brand names" (like Lambright) is obtaining points apart to bring them in the door. Many domestic couches do not come apart and, if they have arms or are longer than the door is high, it can be next to impossible to get them in the door.
So today I want to cover some of the most crucial facets to think about when do it yourself a remodelling for a sofa couch and also a few of our favored options (and the ones we took into consideration when refurbishing our very own Camper) Changing with a Replacing with an entirely for the existing couch I will discuss every one of them and some essential point to take into consideration when determining what route to go.
But there are numerous considerations to have in mind when considering going this course:: As we point out in this blog post that covers 5 points we found out throughout our remodel. Prior to adding anything to your motor home, see to it that the couch you will use weight the exact same or much less than the one you are taking away.: A lot of residential sofas will certainly need to either be bolted to a surface or be briefly safeguarded in some means while en route.
Replace Rv Flooring Diamond Bar, CA
While Kaylie's sofa from @bloomingoaksfarm is not a sleeper sofa, I had the ability to find a pair that looks like the design that is certainly a sleeper sofa. Those would be so best for a motor home with a tiny area. Actions 55 x 38 x 38 inches and includes bi-fold twin dimension memory foam cushion.
This twin couch dimensions are 54 x 32.5 x 35.5 inches and the mattress measurements are 72 x 37 x 3 inches. It resembles what Shelvy from @shelbyadrift did is usage two different sofa chairs together, but I simply love the look of the natural leather in comparison with the remainder of the area.
This contemporary brownish futon steps 70 x 34.5 x 31 inches. Her sofa is a pull-out however Light grey couch bed, procedures 72.5 x 43.3 x 15 inches This dark grey sleeper bed steps 89 x 33.8 x 33.8 inches.
Awnings For Trailers Diamond Bar, CA
While this choice of leather sofas, they are large sufficient that can be made use of to rest on them. This lovely tufted mid-century natural leather sofa measures 86.6 x 36.2 x 30.3 inches.
Trying to find even more concepts for tiny couches? Examine all these various other picks below: Obviously, if changing your RV sofa with another newer design is what you desire there are numerous alternatives like the ones listed below in various shades and sizes that will function for most RVs.: For the most part replacing it would be quite easy, they would be bolted to the ground so there's no threat of it moving while in transit.: The option of designs is very limited, as well as the offering of fabrics and shades.
Which's when making small adjustments can be really impactful, for this kind of circumstances, slipcovers can be the most effective method to go. I explain a lot more regarding it below! An additional option that could require some kills in the structure department is to venture into making your own sofa. I have actually just seen one couple do this (Katie and Eric from) and I am so satisfied they made a complete article clarifying every step! You can locate the message on just how they built their small RV couch below.
Rv Sofas Diamond Bar, CA
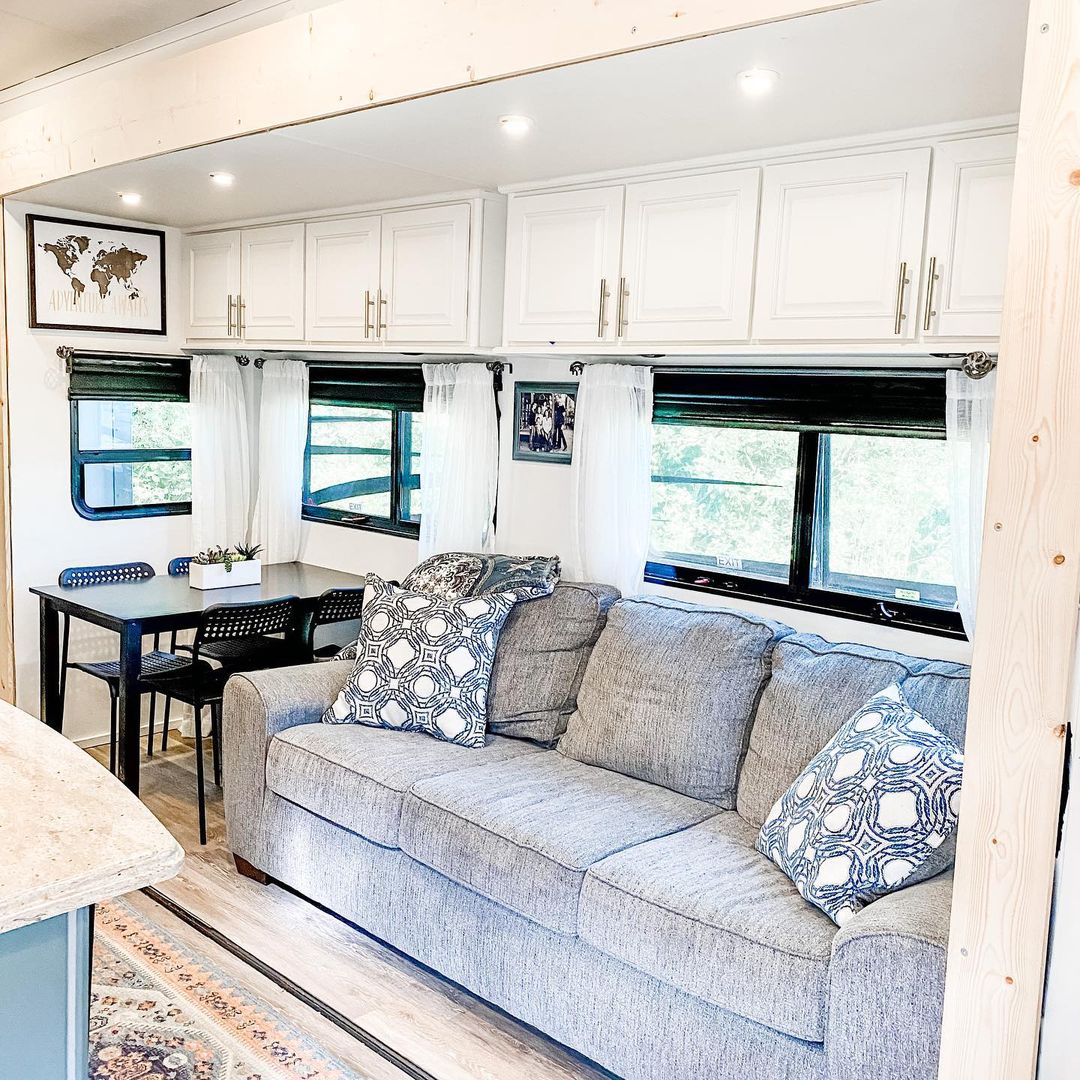
Here you can see that we selected a black hair for our sofa and I selected a grey water-proof material for the slipcovers of the seats in the kitchenette, I love just how very easy to cleanse they are, plus making them was not tough. Rv Interior Furniture Diamond Bar. I will share a complete tutorial of exactly how I made our covers quickly but in the meantime, I intended to share the incredible work that Allie from made on the covers for her sofa
Save this blog post for later on making use of the pins listed below.
This is in part due to the variety of floorplans and the way Recreational vehicles are engineered to make the finest use of area. Things like Motor home dining rooms and sleeper couches may have differed sizes which basic mattresses could not fit or keep conveniently.
At Bradd and Hall, we carry the finest motor home furnishings up for sale, including a selection of seating choices. We provide RV couches, recliners, movie theater seating, captain's chairs and more! You can purchase our furniture online and at our motor home furnishings shop in Elkhart, Indiana. We also drape our motor home seating with the finest fabrics like Ultraleather which ins 2015 without fading or fracturing.
Rv Dinette Table Diamond Bar, CA
Our top-notch recreational vehicle Sleeper Sofas, Tri-fold Couch Beds, and Motor Home Jacknife Beds are developed with high quality, comfort and value in mind. Our extensive line of product is constructed around: Lambright Recreational Vehicle Furnishings and Suite recreational vehicle Furniture (custom), the industry's leading motor home Furniture producers. For over 40 years we have actually taken a personal passion in fitting the consumer to the furnishings, and the recreational vehicle furnishings to the train and its intricacies.
I can practically set my watch by my recreational vehicle sofas, due to the fact that specifically 3 years into their lives the joints start to burst and the couches require to be replaced. It's that time once again for us, yet I'm not so sure I desire to simply acquire the same old points again.
Our setup has 2 slides and we have actually got couches on both sides. One side has a dual sofa that folds out into a queen sleeper. The various other side has seating for 4: 2 reclining couches, a center console with cupholders and a great area to shed your phone/keys/wallet, and after that 2 even more reclining couch seats.
I don't desire to lose any kind of seats though, due to the fact that we often have more individuals than seats as it is. Ideas?.
Rv Sofas Diamond Bar, CA
Bradd & Hall offers an expansive option of recreational vehicle sofas offer for sale that will fit completely in your Motorhome, Travel Trailer, Fifth Wheel, or Destination Trailer. Our recreational vehicle couches consists of brands like Lambright and Vacation home. Whether you need a motor home sleeper couch or RV jackknife couch, we bring a variety of versions that range in size and features.
The larger variations consist of facility consoles with cup holders and storage. These motor home reclining chairs are real wall surface huggers that just require three inches of clearance. They provide the optimum convenience, functionality, and storage space for a couch reclining chair. Lambright Motor Home Recliners & Cinema Seats are developed with two or 3 distinctive seats and alternatives included or without facility gaming consoles.
Remodeling Rv Diamond Bar, CA
The normal-sized sofa will occupy an edge of room, nonetheless, the added seats is valuable when taking a trip with extra guests. The increased seating is practical however includes the expense of walking floorspace. Rental property Dormie Sofas can be converted right into a flat location to place an inflatable bed ahead.
The Suite J Lounges placed a distinct twist on the standard sofa and divides into 2 different items for much easier setup. Vacation Home Custom Ensemble" Need custom-made RV furniture or sleek watercraft furniture?
Rv Sofas Diamond Bar, CA
Flexsteel Recreational Vehicle Sleepers Sofas Sofas function as a sofa and after that a bed via a pull-out cushion. The bed will certainly call for 86 from the wall to completely open and many have alternatives for flat floors and raised floor slide outs. Flexsteel feet Sofas exchanges a set bed, just like the jackknife couch, however supplies the added advantage of a full-sized bed in a general smaller dimension.
You can even customized order these motor home sofa bed in your option of shade. One area to buy a personalized recreational vehicle sleeper sofa with storage space is You can see a few of the recreational vehicle sofas with storage they sell here. The rate of recreational vehicle furnishings can be quite frankly surprising, specifically thinking about how RV couches are commonly uneasy to rest on That's why most RV owners pick to change our uneasy, obsolete RV furniture with residential furniture.
In this short article, I'll share sofas in numerous dimensions and designs I've found available online that feature hidden storage areas, making them excellent to put in a RV. However first, I wish to deal with a couple of worries individuals usually raise at the mention of using household furnishings inside a motor home.
It is essential to be mindful of remaining within your motor home's freight weight restriction, along with not drastically changing the original weight distribution, so I have actually detailed the weight of each sofa pointed out in this post where feasible. 64 inches 114.2 poundsDark Gray or Off White If you're seeking a replacement recreational vehicle couch with storage space that's cheaper and more comfortable than typical RV furnishings this tiny sofa with covert storage would make an excellent option.
Replacement Rv Windows Diamond Bar, CA
This certain couch has a number of options to pick from for the cushion/mattress shade. If you favor a different shade of wood there are great deals of sofas similar to this. Rv Interior Furniture Diamond Bar readily available online. 86 inches 192 poundsLight Gray or Dark Gray This sofa is certainly on the bigger dimension for a RV couch, however if you have a long slide it may fit.
Not only exists storage room under the seats and chaise, it converts to a full-sized bed big enough for an averaged-size adult. Search other sofa bed comparable in style to this one on Amazon. 81.1 inches Not listed Skies blue or light grey (other designs & colors available also) The website sells lots of really interesting, modern-day couches like the one revealed above that fold bent on a bed that will easily rest 2 adults and feature a storage compartment too.
Rv Restoration Companies Diamond Bar, CA
78.2 inches90 extra pounds (without mattress) This daybed out to increase the bed size, making it a king-sized bed. This would be excellent for a full time RVing family members with parents who rest in the living space. The bed mattress for this bed would certainly need to be bought separately.
57 for the loveseat, 85 for the 3-seat sofaNot noted reviewer stated it was "lightweight"Gray, Dark Gray, or Light Beige Flexible Modular Design: Customize your living area with this exchangeable modular sectional couch. Prepare it to fit any type of area layout, developing a cozy couch bed, L-shaped or U-shaped couch to match your design.
It is very important to be conscious of remaining within your motor home's cargo weight limit, along with not considerably changing the original weight circulation, so I have actually noted the weight of each couch mentioned in this short article where feasible. 64 inches 114.2 poundsDark Gray or Off White If you're seeking a replacement recreational vehicle sofa with storage that's more affordable and a lot more comfy than typical recreational vehicle furnishings this small sofa with surprise storage would make a wonderful selection.
Rv Couch Bed Diamond Bar, CA
This particular couch has a number of choices to pick from for the cushion/mattress color. 86 inches 192 poundsLight Gray or Dark Gray This sofa is absolutely on the bigger dimension for a Recreational vehicle sofa, however if you have a lengthy slide it may fit.
Not just is there storage room under the seats and chaise, it converts to a full-sized bed big enough for an averaged-size grownup. Browse various other sleeper couches comparable stylishly to this on Amazon. 81.1 inches Not detailed Skies blue or light grey (other designs & shades available too) The internet site markets whole lots of truly intriguing, modern couches like the one shown over that fold bent on a bed that will quickly rest 2 grownups and include a storage space compartment as well.
78.2 inches90 extra pounds (without cushion) This daybed bent on double the bed size, making it a king-sized bed. This would certainly be fantastic for a full time RVing family members with parents that rest in the living-room. The bed mattress for this bed would certainly require to be acquired independently. You can make use of two thin twin-sized bed mattress and stack them during the day, or you could utilize one standard twin mattress plus one that folds when not being used.

OCRV Center
Address: 23281 La Palma Ave Yorba Linda, CA 92887Phone: (714) 909-1444
Email: art@ocrvcenter.com
OCRV Center
There are a few good choices! Item currently sold out. 57 for the seat, 85 for the 3-seat sofaNot detailed customer claimed it was "light-weight"Gray, Dark Gray, or Light Beige Flexible Modular Style: Personalize your home with this exchangeable modular sectional sofa. Organize it to match any kind of area design, developing a cozy couch bed, L-shaped or U-shaped couch to match your decor.
Motorhome Carpets Diamond Bar, CARv Replacement Awnings Diamond Bar, CA
Rv Couch Bed Diamond Bar, CA
Rv Chairs Diamond Bar, CA
Rv Refrigerator Replacement Diamond Bar, CA
Replacement Windows For Campers Diamond Bar, CA
Rv Interior Remodel Diamond Bar, CA
Rv Chairs Diamond Bar, CA
Awnings For Trailers Diamond Bar, CA
Rv Carpet Installation Diamond Bar, CA
Replacement Windows For Campers Diamond Bar, CA
Rv Couch Bed Diamond Bar, CA
Rv Refrigerator Replacement Diamond Bar, CA
Rv Couch Diamond Bar, CA
Rv Replacement Awnings Diamond Bar, CA
Replacement Windows For Rv Diamond Bar, CA
Remodeling Rv Diamond Bar, CA
Replacement Rv Refrigerator Diamond Bar, CA
Rv Sofa Beds Diamond Bar, CA
Rv Sofa Sleeper Diamond Bar, CA
Replacement Windows For Rv Diamond Bar, CA
Rv Carpet Replacement Diamond Bar, CA
Rv Sofa Beds Diamond Bar, CA
Rv Floor Replacement Diamond Bar, CA
Rv Restoration Companies Diamond Bar, CA
Rv Couch Diamond Bar, CA
Rv Dining Table Diamond Bar, CA
Rv Upholstery Diamond Bar, CA
Rv Replacement Furniture Diamond Bar, CA
Rv Dining Table Diamond Bar, CA
Rv Replacement Furniture Diamond Bar, CA
Rv Chairs Diamond Bar, CA
Rv Refrigerator Replacement Diamond Bar, CA
Rv Sofa Sleeper Diamond Bar, CA
Rv Couch Diamond Bar, CA
Rv Carpet Installation Diamond Bar, CA
Replacement Windows For Campers Diamond Bar, CA
Rv Replacement Awnings Diamond Bar, CA
Rv Carpet Replacement Diamond Bar, CA
Rv Dinette Table Diamond Bar, CA
Awnings For Trailers Diamond Bar, CA
Rv Couch Diamond Bar, CA
Rv Sofas Diamond Bar, CA
Rv Chairs Diamond Bar, CA
Rv Dinette Table Diamond Bar, CA
Rv Carpet Replacement Diamond Bar, CA
Rv Restoration Companies Diamond Bar, CA
Rv Floor Replacement Diamond Bar, CA
Rv Dinette Table Diamond Bar, CA
Rv Replacement Awnings Diamond Bar, CA
Awning Installation Diamond Bar, CA
Rv Floor Replacement Diamond Bar, CA
Replacement Windows For Campers Diamond Bar, CA
Rv Carpet Replacement Diamond Bar, CA
Rv Interior Furniture Diamond Bar, CA
Replace Rv Flooring Diamond Bar, CA
Rv Carpet Replacement Diamond Bar, CA
Remodeling Rv Diamond Bar, CA
Rv Dinette Booth Diamond Bar, CA
Rv Sofas Diamond Bar, CA
Rv Couch Bed Diamond Bar, CA
Rv Upholstery Diamond Bar, CA
Replacement Windows For Campers Diamond Bar, CA
Rv Dinette Table Diamond Bar, CA
Rv Replacement Awnings Diamond Bar, CA
Rv Interior Remodel Diamond Bar, CA
Remodeling Rv Diamond Bar, CA
Rv Refrigerator Replacement Diamond Bar, CA
Rv Couch Diamond Bar, CA
Rv Couch Bed Diamond Bar, CA
Replacement Rv Refrigerator Diamond Bar, CA
Rv Interior Remodel Diamond Bar, CA
Rv Sofas Diamond Bar, CA
Rv Floor Replacement Diamond Bar, CA
Rv Restoration Companies Diamond Bar, CA
Rv Dining Table Diamond Bar, CA
Motorhome Carpets Diamond Bar, CA
Remodeling Rv Diamond Bar, CA
Near You Seo Packages Diamond Bar, CA
Local Seo Specialist Diamond Bar, CA
OCRV Center
Table of Contents
- – Remodeling Rv Diamond Bar, CA
- – OCRV Center
- – Replace Rv Flooring Diamond Bar, CA
- – Awnings For Trailers Diamond Bar, CA
- – Rv Sofas Diamond Bar, CA
- – Rv Dinette Table Diamond Bar, CA
- – Rv Sofas Diamond Bar, CA
- – Remodeling Rv Diamond Bar, CA
- – Rv Sofas Diamond Bar, CA
- – Replacement Rv Windows Diamond Bar, CA
- – Rv Restoration Companies Diamond Bar, CA
- – Rv Couch Bed Diamond Bar, CA
- – OCRV Center
Latest Posts
Health Insurance Plans For Family Laguna Hills
Employee Benefits Outsourcing Companies Orange County
Laguna Woods Church Payroll Services
More
Latest Posts
Health Insurance Plans For Family Laguna Hills
Employee Benefits Outsourcing Companies Orange County
Laguna Woods Church Payroll Services