All Categories
Featured
Table of Contents
- – Rv Repair And Service Near Me Chino, CA
- – OCRV Center
- – Rv Mechanics Near Me Chino, CA
- – Rv Repair Centers Near Me Chino, CA
- – Rv Service Repair Near Me Chino, CA
- – Rv Floor Repair Near Me Chino, CA
- – Rv Repair Service Near Me Chino, CA
- – Rv Repair In My Area Chino, CA
- – Motorhome Repair Near Me Chino, CA
- – Rv Repair Places Near Me Chino, CA
- – Camper Ac Repair Near Me Chino, CA
- – Rv Solar Installation Chino, CA
- – OCRV Center
Rv Repair And Service Near Me Chino, CA
I had actually one end appeared like yours. While we went to the rally in Copake, the Dometic associate was there and after taking an appearance, recommended utilizing a plain challenge push the the side back in. I had a piece of dowel rod that match the channel and utilized that.
There is a screw in photo number 3 that requires to be eliminated before dealing with that end - Rv Service Repair Near Me Chino. I found it much easier to stretch out the loosened component of the awning and wedge the actual end of the poly cable, that hard white line, right into the channel and it will certainly hold it in place, releasing a hand, till you can take your "press item" and a hammer and start touching the cable and after that awning/cord combo back in the channel
Rv Mechanics Near Me Chino, CA
As soon as you have the awning back in the channel, replace the screw, making certain it either goes through the poly cord or in front of the cord to pin it against the trainer. If there is no screw on the other end, you require to place one in.
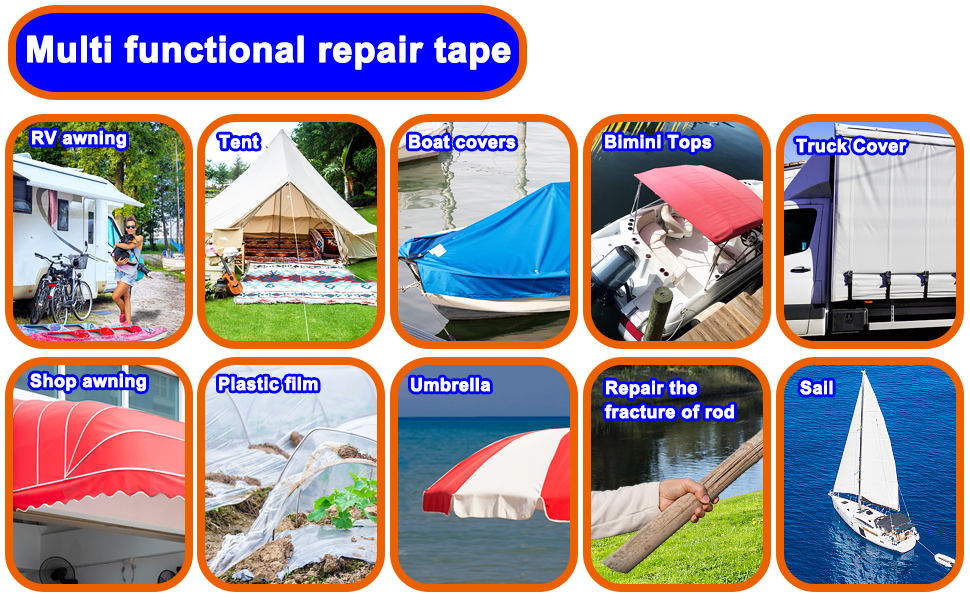
Hi all, We have a little tear in our vinyl awning, AE, what is the very best repair work tape for vinyl awnings? Evaluations on Amazon are a variety.
Rv Repair Centers Near Me Chino, CA
And for RV tourists that grow on satisfying new people in new places, an awning is one of the most basic and most efficient icons of friendliness and sociability. What happens when your RV awning needs a little TLC?
Some typical features you'll locate when taking care of awning repair service consist of: This is, without a doubt, the most regular problem of a harmed motor home awning. And luckily, it is likewise one of the easiest issues to fix. Despite usage (although older awnings will normally experience a better amount of damage), damages to fabric awnings can take place at any moment, under any condition.
Depending on the size of the hole or slit, Motor home owners have choices. Like any kind of mechanical function of your Motor home, after time, the awning arms, and/or the mechanisms that move the arms right into place, will certainly stop to work correctly.
If you have actually obtained an electrical awning that unravels at the press of a button, and it simply makes a decision to quit working someday, you might have something a lot more significant on your hands than a dead remote battery. A break in the circuitry, a bad button, or a poor awning motor might be the offender.
Rv Service Repair Near Me Chino, CA
These items are readily available from on the internet stores, and almost every neighborhood equipment shop. Once more, depending upon the dimension of the damage, awning repair work tape can be even more than a momentary repair however an enduring, permanent service. The majority of kinds of fixing tape are clear in color and reinforced to shield plastic, canvas, and various other sorts of resilient material, offering a waterproof seal that takes place clear, so you don't even see it.
Or you can get a tent repair work set: these usually consist of solid sticky patches that stay with a selection of different textiles. Around the exact same rate as fixing tape, tent repair work kits are also available at hardware or camping shops. For splits and tears bigger than normal, you'll wish to take into consideration something a lot more significant than a regular spot job.

Often, it's not just the awning textile that requires dealing with. You may discover yourself looking to change damaged or absent components to ensure that your awning remains in functioning order. If that's the situation, there are some usual little bits to be knowledgeable about: Handle Insurance adjuster: this device, generally located on the arm, enables you to adjust the tension on the awning material.
Rv Floor Repair Near Me Chino, CA
Do you have a web site we can go to for additional information?.
I concur with Gary, seems like the product is spoiling (peeling). I presume it's best at the edge that is still revealing when the awning is rolled up. Since that location is always subjected to the sunlight and climate. An additional choice may be if you can discover a furniture or canvas store going to do it, you can possibly take the material off (google for instructions) and have them remove the broken component and resew the "grain" (actually called "Keder welt") back on to it.
We have a 78' trainer and believe that the awning is as old as the instructor. Just the other day I was examining it and found both major panels that are sewn with each other in the facility, have the sewing splitting up. I do not intend to take the awning down for repair.
2017 Coachmen Leprechaun Class C MH with a fundamental mechanical awning - gust of wind obtained it and drew the top mounts loose. Did not come right off but the placing screws were taken out regarding 3/4 of the way. As a short-lived repair I had the ability to screw the bolts back in and they got fairly tight, really did not intend to go too for and remove them out any worse.
Rv Repair Service Near Me Chino, CA
You have actually drawn right into a prime camping place in your cherished RV and are expecting spending some stress-free time in the wild. Your space is bright and brilliant and perfect. Only one problemyour recreational vehicle awning isn't functioning. But do not anguish! We're mosting likely to consider the different ways your power awning may malfunction and exactly how to determine where the issues are.
If you're brand-new to RV life you may be asking yourself just how your awning could malfunction. There are 3 main root causes of awning problems: Power disruptions Motor failure Mechanical failures Let's fix all three (for awning fabric repair service, look into this post) Yet initially, a couple of suggestions. We're discussing power awnings today, which implies motors and electrical power.
Rv Repair In My Area Chino, CA
It's easier to have an awning stuck closed than to have it stuck open. Since mechanized awnings do use out and have other issues, find out how to operate them manually before you take your very first RV journey.
If you hear no sound at all when you attempt to extend the awning, this is a typical culprit. If you aren't familiar with the fuse panel, take a look in your owner's guidebook for a guide.
Inspect your Motor home batteries. If your awning is one of the first points you utilize, its failure may be the sign of a low battery or a malfunctioning converter.
Motorhome Repair Near Me Chino, CA
This is where new users, unfamiliar with RV electric systems, must seek advice from a specialist. A defective awning is not worth an electrical fire or an injury.
Since your awning won't extend, you'll require to open it a little bit manually. Just how you access your awning motor will vary depending on your car.
You'll discover them in the trough running down the side of your motorhome or travel trailer from the electric motor. Turn off the power prior to you separate the wires from the lorry from the cords for the awning. Do not tinker live cords. You're mosting likely to examine the circuitry right here in 2 methods.
Next, take a good lengthy look at the awning cables. If whatever looks intact, connect the awning wires to a portable battery.
Rv Repair Places Near Me Chino, CA
If the awning does not function, the trouble is in the circuitry in the awning arms or with the button or motor. Head up to the electric motor and locate the motor electrical wiring quick-connect.
Before removing your defective motor, take the time to lash down the awning arms on both sides. When the old electric motor is removed and disengaged from the gearing, the awning arms will certainly extend out rapidly. Usage straps to avoid this from taking place. Not taking this crucial safety measure can trigger you to fall off your ladder.
The majority of proprietors must have a professional do electrical circuitry repair work and replacement. Now it's time to link the electric motor directly to a mobile battery.
Camper Ac Repair Near Me Chino, CA
You can replace an awning motor yourself, but many of you need to take the car to a Motor home repair work store. This is a DIY project only for knowledgeable Motor home fixer-uppers.
The mechanical components of your RV awning are equally as prone to wear as the electrical wiring and motor. Despite how well an awning is constructed, usage, time, and exposure to the aspects will certainly make repair services and replacement parts required. If you're a RV repair service DIY fanatic, examine out our Recreation Coachworks Components Store for equipment, cords, illumination, locks, electric products, and far more.
Is your head spinning from all that details? We've stated it before, however it bears repeating: A motorhome or traveling trailer is a complex item of equipment. Combining elements of a residence and an automobile brings about a great deal of relocating parts. For a few of you, this is an enjoyable difficulty and you enjoy discovering every system.
It's clever to have a prepare for what you'll do if they won't function, appear bad, or just wear. Call us today at Leisure Coachworks and we'll help you develop a regular upkeep timetable to reduce the opportunity of any breakdowns when you're out living your finest recreational vehicle life.
Rv Solar Installation Chino, CA
On a RV, continuous exposure results in harmed plastic parts and trim and can ruin rolled up awnings that are not safeguarded from the sunlight - Rv Service Repair Near Me Chino. Often the top of the rolled awning shreds, providing the product unpleasant at finest and unsafe to present at worst. As long as the hardware is intact, there's no factor to change the entire awning even if the textile is damaged
OCRV Center
Address: 23281 La Palma Ave Yorba Linda, CA 92887Phone: (714) 909-1444
Email: art@ocrvcenter.com
OCRV Center
1) Eliminate screws that run with the awning rail right into the textile. 2) Get rid of the lag screws from the front and rear upper brackets. 3) Glide the whole awning setting up out of either end of the awning rail. If your existing awning still has a tag with the version number and serial number, contact the maker to be sure that it is still the proper model number prior to buying new fabric.
Full Service Rv Repair Near Me Chino, CARv Generator Repair Chino, CA
Rv Repair In My Area Chino, CA
Rv Repair Services Near Me Chino, CA
Rv Refrigerator Repair Near Me Chino, CA
Motorhome Repair Shop Chino, CA
Rv Repair Services Near Me Chino, CA
Rv Repair And Service Near Me Chino, CA
Best Rv Repair Near Me Chino, CA
Rv Repair And Service Near Me Chino, CA
Rv Repair Service Near Me Chino, CA
Camper Ac Repair Near Me Chino, CA
Best Rv Repair Near Me Chino, CA
Rv Solar Installation Chino, CA
Rv Plumbing Repair Near Me Chino, CA
Motorhome Repair Shop Chino, CA
Rv Service And Repair Near Me Chino, CA
Rv Repair Services Near Me Chino, CA
Rv Repair Service Near Me Chino, CA
Motorhome Repair Service Chino, CA
Rv Repair Shops Near My Location Chino, CA
Rv Delamination Repair Near Me Chino, CA
Rv Generator Repair Chino, CA
Rv Ceiling Repair Chino, CA
Rv Mechanics Near Me Chino, CA
Rv Repairs Near Me Chino, CA
Rv Refrigerator Repair Near Me Chino, CA
Motorhome Generator Repair Near Me Chino, CA
Full Service Rv Repair Near Me Chino, CA
Motorhome Generator Repair Near Me Chino, CA
Motorhome Generator Repair Near Me Chino, CA
Rv Plumbing Repair Near Me Chino, CA
Motorhome Repair Near Me Chino, CA
Full Service Rv Repair Near Me Chino, CA
Rv Mechanics Near Me Chino, CA
Rv Mechanics Near Me Chino, CA
Motorhome Repair Service Chino, CA
Rv Floor Repair Near Me Chino, CA
Motorhome Awning Repair Chino, CA
Motorhome Generator Repair Near Me Chino, CA
Rv Repair In My Area Chino, CA
Rv Repair Service Near Me Chino, CA
Rv Repairs Near Me Chino, CA
Motorhome Refrigerator Repair Chino, CA
Camper Ac Repair Near Me Chino, CA
Motorhome Generator Repair Near Me Chino, CA
Rv Solar Installation Chino, CA
Rv Repair And Service Near Me Chino, CA
Motorhome Repair Service Chino, CA
Motorhome Awning Repair Chino, CA
Motorhome Generator Repair Near Me Chino, CA
Rv Repairs Near Me Chino, CA
Motorhome Repair Shop Chino, CA
Motorhome Refrigerator Repair Chino, CA
Rv Repair In My Area Chino, CA
Rv Solar Installation Chino, CA
Rv Service And Repair Near Me Chino, CA
Rv Floor Repair Near Me Chino, CA
Rv Generator Repair Chino, CA
Full Service Rv Repair Near Me Chino, CA
Motorhome Repair Shops Chino, CA
Rv Repair Services Near Me Chino, CA
Full Service Rv Repair Near Me Chino, CA
Rv Service And Repair Near Me Chino, CA
Rv Delamination Repair Near Me Chino, CA
Full Service Rv Repair Near Me Chino, CA
Rv Floor Repair Near Me Chino, CA
Rv Repairs Near Me Chino, CA
Rv Repair And Service Near Me Chino, CA
Rv Ceiling Repair Chino, CA
Rv Solar Panel Installation Chino, CA
Best Rv Repair Near Me Chino, CA
Rv Delamination Repair Near Me Chino, CA
Rv Repairs Near Me Chino, CA
Rv Repair Shops Near My Location Chino, CA
Rv Plumbing Repair Near Me Chino, CA
Rv Repair Centers Near Me Chino, CA
Motorhome Repair Service Chino, CA
Best Top Seo Company Chino, CA
Around Me Seo For Small Business Chino, CA
OCRV Center
Table of Contents
- – Rv Repair And Service Near Me Chino, CA
- – OCRV Center
- – Rv Mechanics Near Me Chino, CA
- – Rv Repair Centers Near Me Chino, CA
- – Rv Service Repair Near Me Chino, CA
- – Rv Floor Repair Near Me Chino, CA
- – Rv Repair Service Near Me Chino, CA
- – Rv Repair In My Area Chino, CA
- – Motorhome Repair Near Me Chino, CA
- – Rv Repair Places Near Me Chino, CA
- – Camper Ac Repair Near Me Chino, CA
- – Rv Solar Installation Chino, CA
- – OCRV Center
Latest Posts
Atwood Truck Shop Near Me
Best Rv Roof Repair West Covina
Replacement Rv Refrigerator Placentia
More
Latest Posts
Atwood Truck Shop Near Me
Best Rv Roof Repair West Covina
Replacement Rv Refrigerator Placentia