All Categories
Featured
Table of Contents
- – Motorhome Roof Replacement Tustin, CA
- – OCRV Center
- – Rubber Roof For Camper Tustin, CA
- – Rv Roof Leak Repair Near Me Tustin, CA
- – Rv Trailer Roof Repair Tustin, CA
- – Best Rv Roof Repair Tustin, CA
- – Rv Roof Repair Tustin, CA
- – Rv Roof Maintenance Tustin, CA
- – Rv Roof Maintenance Tustin, CA
- – Rv Slide Out Roof Repair Tustin, CA
- – Rubber Roof For Rv Tustin, CA
- – Rv Fiberglass Roof Repair Tustin, CA
- – Rv Roof Leak Repair Tustin, CA
- – Rubber Roofing For Rv Tustin, CA
- – OCRV Center
Motorhome Roof Replacement Tustin, CA
He strolls you tip by action with the straightforward procedure for patching and strengthening TPO recreational vehicle roofing liner with rubber tape strips, which you can get from simply concerning any kind of reputable dealer. Dicor makes a terrific set that Dave constantly recommends. In this case, the recreational vehicle's TV antenna has used little openings right into the TPO RV roofing system, so to stay clear of gurgling under the membrane from rainfall and sun damages, Dave uses these rubber patches to cover the holes and maintain the roofline watertight.
Take advantage of Dave's expert ideas to avoid that tiny cut on your TPO Recreational vehicle roofing system from turning into a costly migraine! Once we're up on top below, we cleansed this roof covering and we discovered a pair of areas, we see right here where this roof covering antenna comes down in.
Rubber Roof For Camper Tustin, CA
It's simply a rubber, the old design is similar to this, and it gets liquid chalked white, it'll start to wear away, yet I get any type of dampness under here and it's gon na begin to operate in. Currently, these 2 spots take place ahead from the antenna, as this comes down here and it's wearing right into 'em.
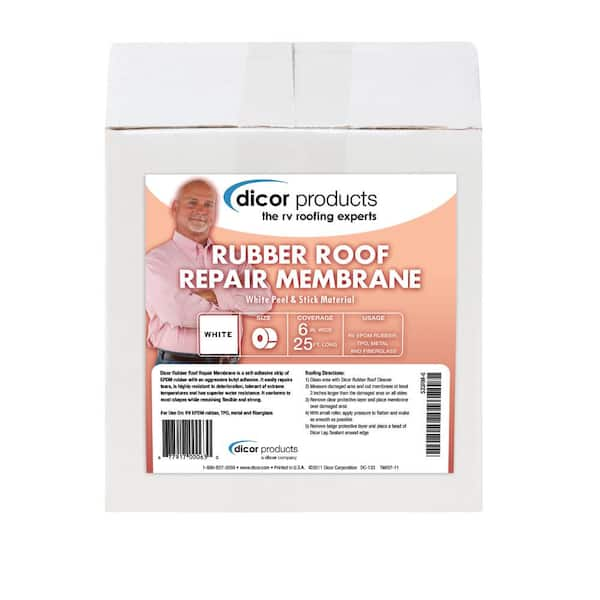
And I'm gon na place this in there simply to provide it a bit if reinforcement to ensure that I don't pierce that in future so. Obtained one right here, one right below, so I'm just gon na take and cut this concerning 2 lengths, right there. And this simply occurs to be a, a leaks, Dicor makes it, DiSeal they call it, very same kind of material, and it simply has a flap on below.
Membrane can be glued either side down. Single-Ply membrane layers coincide shade throughout. Membrane has to be set up onto clean wood surface, do not install in addition to existing membrane, adhesive, etc. Router all vent and accessory openings. Sand all openings, seams, and sides to a smooth surface. Eliminate all debris off roofing with airline.
"Bed Sheet" the membrane layer. That is, fold it in fifty percent so fifty percent of the roof is exposed. 3. Apply glue in a damp film density of 8-10 mils with a short-napped paint roller to the exposed half of the roofing system outdoor decking, brush can be utilized however is harder. (1 girl.
Rv Roof Leak Repair Near Me Tustin, CA
Alternative method, essential membrane in position using" staples 3"-5" apart after that use bar. If roof-edge moldings are not set up on roof throughout this time around membrane layer will peel-up as drying out. 8. Apply putty/butyl tape to the backside of the front and rear discontinuation moldings/caps. Front cap will certainly lay on top of the membrane layer, membrane layer needs to lay on top of the back cap.
Both edges of the front and rear roof covering molding need to be secured with caulk/sealant. Utilizing an utility blade "x" reduced all roof openings.
There is no demand to spread the sealer as you are using it. * Butyl tape gives the "Primary Seal" versus water infiltration or penetration in these membrane roofing system settings up.
Rv Trailer Roof Repair Tustin, CA
To attain best bond, relate to both substrates with 5-6 mil layer weight and permit to completely dry, after that laminate to membrane layer and apply pressure with roller to insure 100% contact. Diluent Water, if needed. Use as obtained. Clean-up calls for only cozy water. Store item in an awesome, completely dry area. Item ought to not be stored in direct sunshine.
Eye call If item calls eye, flush with water for at least 15 mins and seek medical interest right away. Skin get in touch with If product contacts skin, laundry affected location with soap and water.
Mask both sides of joint with masking tape. Cut nozzle to preferred bead dimension. Pierce seal. Lots sealer cartridge in caulking weapon. Area nozzle right into joint and apply sealer right into space. Use above 40 deg F (5 deg C)Smooth or "tool" grain if required. Eliminate concealing tape right away. Clean hands and tools extensively before cleaning with soap and water.
In situation of eye contact flush eyes with water for 15 minutes and call a doctor. In situation of skin contact, thoroughly clean skin with soap and water.
Best Rv Roof Repair Tustin, CA
Some recreational vehicle repair work can be temporarily put on hold, yet a RV roof repair service is NOT one of them. Falling short to repair damages to your RV's roofing system can cause a frustrating and pricey set of situations that will only get even worse with time. Due to the fact that roofing system repair is such an important piece of RV upkeep, we're sharing some crucial suggestions for finding and repairing motor home roof openings.
The ever-changing atmosphere can cause caulking and seals to broaden and get repetitively, which can ultimately result in holes, fractures, or gaps in the roof covering. Holes can likewise happen when you're on the relocation. A tree branch might scrape and penetrate the rooftop if you were to underestimate the height of a tree arm or leg, for example.
If your RV takes place to be parked there at the time, your motor home roofing can endure extensive damages. Not all Recreational vehicles have the exact same kind of roof, certainly. The five most typical kinds of motor home roof are EPDM, TPO, PVC, fiberglass, and aluminum. Let's have a look at some details, including the advantages and disadvantages of each: EPDM, TPO, and PVC are all commonly referred to as "rubber roofings," although they're not identical items.
TPO roofings are offered in a selection of densities, depending on the supplier's specs. Whether the thicker material is more reliable over the long run appears to be a warm topic in RV conversation online forums. TPO roofs have a laminate cover that aids maintain them from damaging and establishing cracks.
Rv Roof Repair Tustin, CA
It can likewise be sealed with solvent welding and connected with adhesives. For a a lot more comprehensive take a look at the numerous sorts of products utilized for recreational vehicle roofing systems, have a look at PVC vs TPO vs EPDM RV Roof Covering Options: Which Is the very best Selection? Fiberglass is another typical RV roof covering material that's incredibly long lasting.
And be especially cautious if your roofing system is damp so that you do not slide and diminish! A quick check of the sealant around vents, fans, solar panels, ac unit, and antennas every one month approximately keeps our recreational vehicle roof covering in terrific condition, avoiding possibly costly leakages. This Dicor sealer has actually fractured significantly enough that it can quickly be enabling water to permeate through the roof covering and needs to be cleaned up and re-sealed.
Ridding your Motor home's roofing system of damaging substances is one of the best preventative procedures you can take. You'll desire to do a basic sweeping of your Recreational vehicle's roofing to get rid of excess leaves and debris.
Rv Roof Maintenance Tustin, CA
Next, spray the roofing with clean water to remove loose dirt and crud. Having a couple of tools on hand, such as a long-handled sponge mop or soft brush, is useful for this procedure. Examine your owner's handbook to learn what the producer recommends for cleansing your RV, and the roof covering specifically.
Rubber roof covering cleansers can additionally work well with fiberglass and aluminum roofings, yet be sure to confirm any cautions on the product packaging to verify before buying. Throughout the cleaning process, offer added interest to locations where mold and mildew, mold, tree sap, bird droppings, or various other discolorations exist. Wash extensively and typically to avoid residue and grime build-up.
Rv Roof Maintenance Tustin, CA
It can be found in a number of different mixes of width & length, and numerous various shades: Clear your metal recreational vehicle roof of any type of debris prior to you start a repair. Examine the repair location carefully and make note of what's around it. Bear in mind, steel roof coverings can hiding real degree of any kind of damages.
Eternabond is among one of the most popular tapes (it is available in a number of colors, consisting of gray which will likely match your metal roof covering better than other selections), which can really be made use of on any kind of sort of recreational vehicle roof covering, and is practically irreversible. The key is to ensure any kind of joints are entirely covered by the tape, overlapping if needed.
Rv Slide Out Roof Repair Tustin, CA
You're likewise at their grace in terms of the repair timeline. If you're useful, it's feasible to take care of small cracks and acnes in a fiberglass roofing system.
Sand the damaged area to offer a smooth surface for repair work sealants. If you're confident, you can also use fiberglass resin, and fiberglass fabric if required, to make the fixing on your own.
Rubber Roof For Rv Tustin, CA
Keep in mind that the service warranty on your roof covering might depend on having your RV examined annually and proof that you have actually been doing preventative upkeep. Maintaining your recreational vehicle roofing system seals is important to avoid a leak and severe damages. The joint where the rubber roofing satisfied the sidewalls permitted water to leak underneath, doing considerable (and pricey) damage to the base.
One of the most essential skills you can understand for maintaining your RV is roofing system repair work. It's simple to ignore damage to a motor home roofing system, yet it is among one of the most essential facets of camper upkeep. A lot of individuals who have been RVing for any type of size of time have actually come to be accustomed to the truth that they will have to do some upkeep and repair work by themselves at some point.
When it comes to delaying Recreational vehicle upkeep and repair work, one of the worst things that can take place is water damages. When there's a problem with your roofing, it happens rapidly.
Rv Fiberglass Roof Repair Tustin, CA
These can deteriorate the roof covering product with time, weakening it. There are cleansers made specifically for recreational vehicle roofing systems and each type of product. If you're servicing a vast area, tape off the rest of your motor home and cover it with plastic to stop roof covering cleaners or sealants from leaking down the sides.
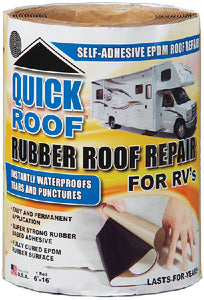
Another thing that all RV roofings have in common is the sort of fixings that they can need. The sealant, joints, and spot holes and slits are the three things you can repair. If your EPDM or TPO rubber roofing appears to be flaky or milky, a fresh layer of sealer is what it needs.
When acquiring the rubber roof covering layers or sealers, keep your RV's dimensions in mind to guarantee you get the proper quantity. After cleaning the entire roofing and allowing it to completely dry, apply a layer of paint to the roofing utilizing a roller. Rubber Roofing For Campers Tustin. See to it to check out and adhere to the instructions on the sealant bundle for optimal preparation
A patch will certainly be called for if you discover a little puncture or tear on your RV roof covering. Manufacturers have actually created repair work and Motor home roofing adhesives that are simple to use and long-lasting. Most patches need little preparation besides cleansing the damaged location and using the patch over it, much like a band-aid.
Rv Roof Leak Repair Tustin, CA
Fiberglass roofs' leading layer, like RV rubber roofings', can oxidize with time, providing a flaky, chalky appearance. Scratch off any loose, crinkled portions of the finishing prior to cleaning and sand the roofing's surface making use of fine to medium grit sandpaper afterwards. The layer will certainly cling much better to a somewhat abraded surface.

After the location has been smoothed and cleaned up, add fiberglass spots and glue layer by layer, as routed by the repair kit. At the end, layer your recreational vehicle with a sealant to the project and redecorate the location as needed. The resealing of light weight aluminum and other metal motor home roofs is done with a particular coating created a light weight aluminum roof product.
The simplest approach to repair a steel roofing with more serious damage is to change the steel panel, which is a procedure that may vary based on your motor home. You may be able to repair your steel roofing system making use of a peel-and-stick patch depending on the extent of the damage. See to it you pick one that is especially planned for metal roofings, as the glue chemistry differs.
Rubber Roofing For Rv Tustin, CA
A friend requires to move into it quite fast. I'm thinking of using 'blue board' foam insulation, between the 'rafters' to hold up the roofing material (which is presently sagging down) and make the roofing drain. I will certainly also need to spot a couple small holes where a tree branch landed on the roofing system (water dripping in these holes is what decayed the plywood) and a couple of other small places where the rubber is doing bad.
I'm seeking various methods. Any experiences and tips on fixing a camper roof? Thx-Ace.
Long tale short, Progressive paid our whole initial Estimate - COMPLETELY. They took till last week to do it. This is the most awful insurance coverage case we have actually needed to manage. The consumer was very dismayed due to the fact that they had Springtime Damage outdoor camping strategies, and we didn't know if we 'd be able to get the fixings performed in time as a result of all the delays.
OCRV Center
Address: 23281 La Palma Ave Yorba Linda, CA 92887Phone: (714) 909-1444
Email: art@ocrvcenter.com
OCRV Center
Yet he called Progressive and should have been not-so-nice due to the fact that he got the adjustor's supervisor included. When the one in charge guy spoke to the consumer, he was playing it up large. He claimed to get the repair services done ASAP so they could make their journey, we can buy components overnighted and they would certainly cover it.
Rv Roof Repair Service Near Me Tustin, CARv Fiberglass Roof Repair Tustin, CA
Rv Roof Leak Repair Near Me Tustin, CA
Replace Rv Roof Tustin, CA
Rubber Roof Installation Tustin, CA
Epdm Rv Roof Repair Tustin, CA
Rv Roof Leak Repair Near Me Tustin, CA
Rv Roof Repair Near Me Tustin, CA
Rv Roof Repair Near Me Tustin, CA
Rv Trailer Roof Repair Tustin, CA
Rv Roof Repair Tustin, CA
Rubber Roofing For Rv Tustin, CA
Rv Fiberglass Roof Repair Tustin, CA
Repair Rv Roof Tustin, CA
Repair Rv Roof Leak Tustin, CA
Rv Roof Repair Service Near Me Tustin, CA
Rv Roof Leak Repair Tustin, CA
Rubber Roofing For Rv Tustin, CA
Rv Rubber Roof Replacement Cost Tustin, CA
Rv Roof Repair Service Near Me Tustin, CA
Rv Rubber Roof Maintenance Tustin, CA
Rubber Roof Installation Tustin, CA
Rv Rubber Roof Replacement Cost Tustin, CA
Rubber Roof Installation Tustin, CA
Rv Rubber Roof Replacement Cost Tustin, CA
Rv Roof Repair Service Near Me Tustin, CA
Resealing Rv Roof Tustin, CA
Repair Rv Roof Leak Tustin, CA
Rv Roof Repair Tustin, CA
Rv Roof Repair Tustin, CA
Rubber Roof For Camper Tustin, CA
Rv Roof Maintenance Tustin, CA
Rv Rubber Roof Replacement Cost Tustin, CA
Rv Roof Replacement Tustin, CA
Epdm Rv Roof Repair Tustin, CA
Epdm Rv Roof Repair Tustin, CA
Rv Rubber Roof Replacement Cost Tustin, CA
Rubber Roof For Rv Tustin, CA
Repair Rv Roof Tustin, CA
Rubber Roof Installation Tustin, CA
Repair Rv Roof Leak Tustin, CA
Rubber Roofing For Campers Tustin, CA
Rv Fiberglass Roof Repair Tustin, CA
Replace Rv Roof Tustin, CA
Rv Roof Replacement Tustin, CA
Rv Trailer Roof Repair Tustin, CA
Rv Trailer Rubber Roof Repair Tustin, CA
Rv Trailer Roof Repair Tustin, CA
Rv Fiberglass Roof Repair Tustin, CA
Rv Roof Repair Tustin, CA
Rubber Roofing For Rv Tustin, CA
Rv Roof Repair Near Me Tustin, CA
Rv Roof Leak Repair Tustin, CA
Roof Repair For Rv Tustin, CA
Class C Rv Roof Repair Tustin, CA
Repair Rv Roof Tustin, CA
Rv Rubber Roof Replacement Tustin, CA
Rv Slide Out Roof Repair Tustin, CA
Repair Rv Roof Leak Tustin, CA
Rubber Roof For Camper Tustin, CA
Rv Rubber Roof Maintenance Tustin, CA
Rv Roof Replacement Tustin, CA
Rv Roof Maintenance Tustin, CA
Rv Rubber Roof Replacement Cost Tustin, CA
Repair Rv Roof Tustin, CA
Rv Roof Leak Repair Near Me Tustin, CA
Rv Rubber Roof Repair Tustin, CA
Motorhome Roof Replacement Tustin, CA
Rubber Roof For Rv Tustin, CA
Repair Rv Roof Leak Tustin, CA
Rv Roof Leak Repair Tustin, CA
Rv Roof Repair Tustin, CA
Repair Rv Roof Leak Tustin, CA
Rv Rubber Roof Replacement Cost Tustin, CA
Rv Slide Out Roof Repair Tustin, CA
Rv Roof Leak Repair Tustin, CA
Rv Roof Repair Fiberglass Tustin, CA
Rubber Roofing For Rv Tustin, CA
In Seo Companies Tustin, CA
Finding A Good Local Seo Agencies Tustin, CA
OCRV Center
Table of Contents
- – Motorhome Roof Replacement Tustin, CA
- – OCRV Center
- – Rubber Roof For Camper Tustin, CA
- – Rv Roof Leak Repair Near Me Tustin, CA
- – Rv Trailer Roof Repair Tustin, CA
- – Best Rv Roof Repair Tustin, CA
- – Rv Roof Repair Tustin, CA
- – Rv Roof Maintenance Tustin, CA
- – Rv Roof Maintenance Tustin, CA
- – Rv Slide Out Roof Repair Tustin, CA
- – Rubber Roof For Rv Tustin, CA
- – Rv Fiberglass Roof Repair Tustin, CA
- – Rv Roof Leak Repair Tustin, CA
- – Rubber Roofing For Rv Tustin, CA
- – OCRV Center
Latest Posts
Health Insurance Plans For Family Laguna Hills
Employee Benefits Outsourcing Companies Orange County
Laguna Woods Church Payroll Services
More
Latest Posts
Health Insurance Plans For Family Laguna Hills
Employee Benefits Outsourcing Companies Orange County
Laguna Woods Church Payroll Services