All Categories
Featured
Table of Contents
- – Resealing Rv Roof Walnut, CA
- – OCRV Center
- – Rv Roof Repair Fiberglass Walnut, CA
- – Roof Repair For Rv Walnut, CA
- – Rv Roof Repair Service Near Me Walnut, CA
- – Rv Roof Leak Repair Walnut, CA
- – Rubber Roof For Camper Walnut, CA
- – Rv Roof Repair Walnut, CA
- – Rv Slide Out Roof Repair Walnut, CA
- – Rv Roof Replacement Walnut, CA
- – Replace Rv Roof Walnut, CA
- – Resealing Rv Roof Walnut, CA
- – Class C Rv Roof Repair Walnut, CA
- – Rubber Roof For Camper Walnut, CA
- – OCRV Center
Resealing Rv Roof Walnut, CA
Apply sticky to the bottom and press the patch securely into area. Seal the edges with lap sealant. Take into consideration making use of a fluid roof covering: Conceal off locations not to be coated. Walnut Rv Roof Leak Repair. Mix and pour the finish evenly across the roofing system. Utilize a roller to spread it in an uniform layer.
Tidy every 3-6 months, depending on use and storage space. Avoid auto parking under trees where arm or legs and sap can harm the roofing system. While several RV roofing repair work can be DIY jobs, some circumstances require expert aid: Structural damages or major roof drooping Big, covert leaks that are hard to map Complete membrane layer replacement Insurance-related repairs Finding out exactly how to do a Recreational vehicle roofing repair work equips you to secure your investment, save money, and prevent mid-trip calamities.
Rv Roof Repair Fiberglass Walnut, CA
If you don't evaluate, reseal, and repair your recreational vehicle roofing frequently, you will wind up with some beautiful dreadful water damages. This is something that will rapidly decrease the worth of your recreational vehicle and might also make it unusable. Thankfully, caring for your motor home roofing system is something you can possibly do all by yourself.
After regarding 10 years, it will certainly likewise be essential to reseal the entire roofing system (Walnut Rv Roof Leak Repair). To do this, you'll require to climb up onto the roofing system, yet be really cautious when you do.
Next off, you'll want to clean your roof completely, so as to eliminate any dirt fragments. You can utilize a lengthy taken care of brush for this, but never ever use a cleaner that has petroleum solvents or citrus active ingredients on your rubber or plastic roofing system. These kinds of cleansers will certainly create irreversible damages to the surface area.
Roof Repair For Rv Walnut, CA
While you're cleansing, scrape off any kind of debris or old roof product, but beware while you do this as you might easily elongate a tear, or even punch a hole with the roofing. You need to then dry out the roofing as best as you can. Keep In Mind: Rubber motor home roofing systems can be extremely unsafe when wet.
After the roof covering is clean, you are mosting likely to wish to examine the joints for openings, splits or peeling off, so you can reseal wherever required. You'll desire to make a factor of resealing all joints once a year whether or not they show indications of wear.
When it concerns choosing the finest motor home roofing system sealant, you'll desire to take into consideration whether you are repairing a tear, resealing a joint, or sealing the entire roofing system. The type of roofing is likewise crucial to remember, as motor home roofs can be made from either EPDM (Ethylene Propylene Diene Monomer) and TPO (Thermal Polyolefin) and you need the item you make use of to be compatible with your roof covering kind.
Rv Roof Repair Service Near Me Walnut, CA
Dicor Self-Leveling Lap Sealant is an excellent choice for going over old roof covering seals. It can be made use of for spot sealing or to reseal every seam on the recreational vehicle roofing. Simply clean up the location well and use with a caulk gun. The stuff will level itself out, so don't fret about that component.
Comparable to the EPDM system listed above, this layer item will cover your TPO roofing and help it last another 10 years. Before EPDM and TPO, metal was the material of selection for Recreational vehicle roofing systems.
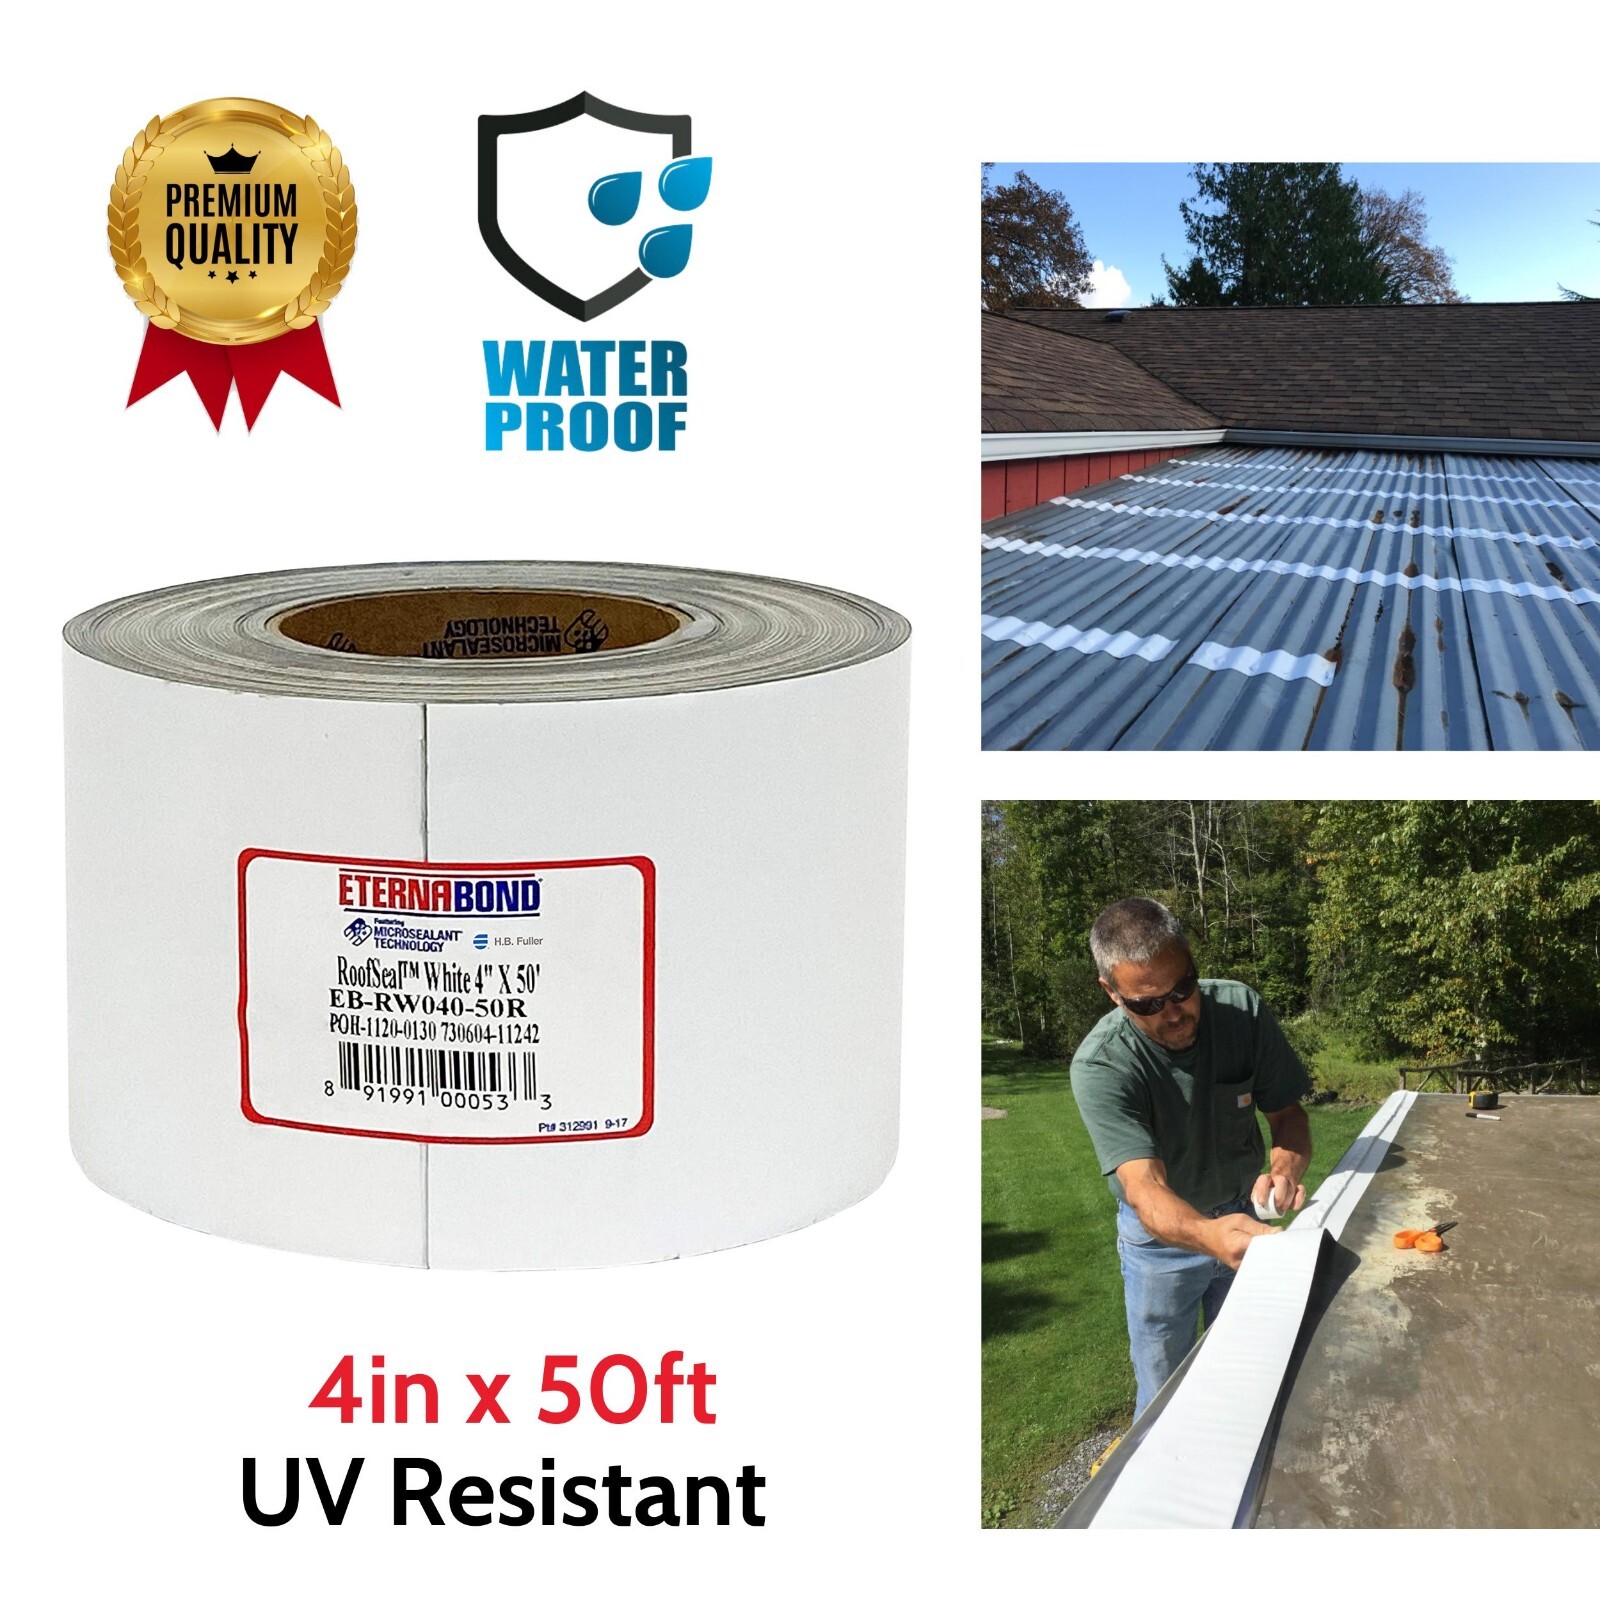
The aforementioned EternaBond is still king when it comes to repairing tiny problems on a steel roofing system. Recreational vehicle metal roof coverings do require to be completely resealed from time to time.
Rv Roof Leak Repair Walnut, CA
Dicor Self-Leveling Lap Sealant works well for this job. You'll require to get rid of the existing roofing.
Inspect plywood for rot, bowing, mold and mildew, or splintering. Change harmed items.
Do this in small pieces all along the roof covering, cutting holes in the rubber roof covering for any kind of feature that will certainly go back into the roof covering. Lastly, replace your roof covering's fans, skylights, and a/c device. Seal each joint with the lap sealer we pointed out earlier. You'll likewise wish to use lap sealer to the sides of the roofing.
Rubber Roof For Camper Walnut, CA
In this message, we want to share with you just how to Do it yourself RV roofing fixing. Understanding just how to DIY a lot of the points that can break or mess up will certainly conserve you not only a whole lot of cash on Motor home fixings yet can additionally save you a great deal of prospective time in the shop!
I might get a little compensation when you make an acquisition utilizing my link. Occasionally, though, we locate ourselves in unplanned scenarios. This is how we finished up with a few little rips on the roofing system of our Motor home.
We believed we were free from the branches, however we finished up capturing a few of them on the much left side of the roofing system. There were an overall of 4-5 small openings in the side of the roof covering. Originally, we really did not examine the roofing system because we didn't assume we strike anything.
Rv Roof Repair Walnut, CA
One of the rips in our recreational vehicle roof covering A few weeks later, we sustained an extreme thunderstorm and a great deal of rainfall. During the tornado, we discovered that we had a tiny quantity of water leaking via one of the lights in the restroom. Thankfully, we did not end up with any type of permanent water damage.
He covered it as finest he might with heavy-duty gorilla tape and after that got the products needed to do a motor home roofing system fixing. The EPDM rubber roofing product that a lot of RVs feature is generally rather difficult regarding roofing materials go. Rubber roofs last for years, yet they do tear if caught hard enough.
Rv Slide Out Roof Repair Walnut, CA
In our instance, this implied getting rid of the gorilla tape that we had actually made use of as a temporary repair while we waited for the products we got to show up. You'll wish to cleanse the location around the tear that you will be covering well. This permits the spot to correctly stick and will certainly protect against future leakages.
To cleanse the roof, make use of rubbing alcohol and either a dustcloth or paper towels. Tucker went over the area 2-3 times to make certain it was cleansed truly well. Let it completely dry completely prior to moving on. Applying the Externabond tape After the location has extensively dried from cleaning, it's time to add the Eternabond tape, which is a RV roofing repair service tape.
You will certainly intend to distribute just how much you need and reduce an item accordingly. Remove the backing and use thoroughly over the tear in the roof. Once it has touched the roofing, it sticks pretty swiftly, so you'll wish to make certain and placement it right the very first time.
Rv Roof Replacement Walnut, CA
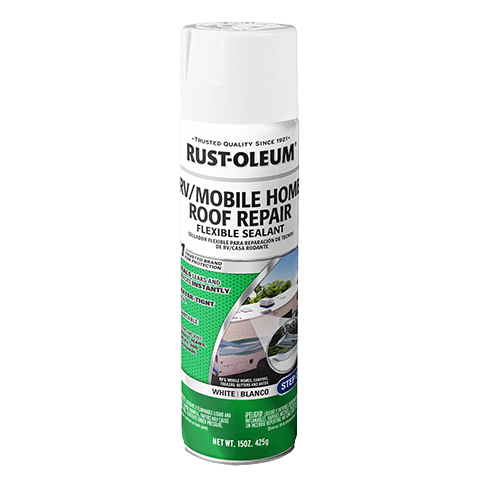
Press firmly and remain to rub it and ravel the spot for a number of minutes. Utilizing a caulk weapon, layer the entire patch with Dicor 501LSW-1 Epdm Self-Leveling Lap Sealer. This rubber sealant develops a secure additional seal on your rubber roof covering and ensures that the leakage is correctly sealed.
There are a great deal of Dicor recreational vehicle roof covering repair products that you can acquire consisting of roof finishings, roof sealer, and much more for the surface of your roofing system. Using the Dicor lap sealer Beginning on the sides and work your method around the entire spot, loading in the center as you go.
Wipe any excess off and don't permit it to run down as well far. This is a self-leveling sealant so you need to end up with a relatively level spot. According to the maker, it will be waterproof in 4 hours, 80% healed in 2 days, and 100% cured in 1 month.
To replace an entire Recreational vehicle roofing with substantial damage would certainly result in much even more expensive fixings. To prevent Recreational vehicle roofing system issues, inspecting your roofing system consistently throughout Recreational vehicle maintenance is an excellent idea.
Replace Rv Roof Walnut, CA
Your recreational vehicle is a home on wheels, whether for several days each time or throughout the year. Like a home, the water supply can leak, such as the fresh water tank or the hot water heater. A motor home is also more at risk to particular leaks, such as in the roofing, because it is mobile and has a much more lightweight design than your home.
The most effective technique for reducing costs is identifying usual leakages early and giving a reliable fix. Your RV is a significant financial investment. Assessments and repairs keep it in great condition so you can appreciate more experiences on the roadway. Below are a few reasons inspections and repair services matter: When you check your recreational vehicle consistently, you can catch concerns like leakages prior to they cause substantial damage to your inside.
Resealing Rv Roof Walnut, CA
Water trickling from the a/c system outside the recreational vehicle is typical during operation. The water must adhere to a certain course down the networks on the roofing that lead it down to either the forward or aft corner of the rig. Nonetheless, if you see water dripping inside or leaking in an additional location outside, that could symbolize an issue with the system.
Plumbing leaks can reveal up in the storage space area. In some cases, water damage presents noticeable indicators, however you may not see it promptly in other cases. Below are a few things to keep an eye out for: Mold and mildew and mold growth Visible water discolorations or rust Pools or damp areas Undesirable scents Flaking paint or aluminum Squeaky, soft or irregular wall surfaces or floors Distorted or misshapen wood closets or trim Condensation on windows or inside cupboards Water damages or condensation in your motor home can trigger different hazardous impacts.
Class C Rv Roof Repair Walnut, CA
They might also reduce resale value. Before you start the procedure of camper leakage repair, you require to find the resource. Comply with these steps to recognize the leak's beginning point: Check the roofing system, walls, ceilings and doors to discover any type of locations with worn or broken seals and caulking. Check the walls and floorings for any soft spots.
Consider any type of visible plumbing pipes and fittings for rust, trickling or wet areas. Run water with the taps and check for dripping water at the links. Take a look at wastewater and freshwater systems for splits or leakages in the tanks, links and hose pipes. Scent for mildewy smells to find where they come from.
Rubber Roof For Camper Walnut, CA
OCRV Center
Address: 23281 La Palma Ave Yorba Linda, CA 92887Phone: (714) 909-1444
Email: art@ocrvcenter.com
OCRV Center
Spray certain areas while another person stands inside the camper to see where water enters. A flashlight lights up the room for much more reliable inspection in confined, dark areas like closets and plumbing fixtures. This tool connects to tubes to inspect for uncommon stress goes down that might indicate a leakage.
Rv Roof Repair Service Near Me Walnut, CARepair Rv Roof Leak Walnut, CA
Rubber Roofing For Campers Walnut, CA
Rv Roof Repair Walnut, CA
Rubber Roof Installation Walnut, CA
Rv Roof Repair Service Near Me Walnut, CA
Rv Roof Repair Service Near Me Walnut, CA
Rv Roof Repair Walnut, CA
Repair Rv Roof Walnut, CA
Rv Rubber Roof Replacement Cost Walnut, CA
Epdm Rv Roof Repair Walnut, CA
Rv Roof Repair Walnut, CA
Class C Rv Roof Repair Walnut, CA
Rv Trailer Rubber Roof Repair Walnut, CA
Replace Rv Roof Walnut, CA
Rubber Roofing For Campers Walnut, CA
Repair Rv Roof Walnut, CA
Rubber Roof For Rv Walnut, CA
Best Rv Roof Repair Walnut, CA
Rv Rubber Roof Repair Walnut, CA
Rv Rubber Roof Maintenance Walnut, CA
Rubber Roof Installation Walnut, CA
Rv Slide Out Roof Repair Walnut, CA
Rv Roof Replacement Walnut, CA
Rv Roof Leak Repair Near Me Walnut, CA
Rv Trailer Roof Repair Walnut, CA
Rv Roof Repair Walnut, CA
Rv Roof Repair Walnut, CA
Rv Trailer Roof Repair Walnut, CA
Resealing Rv Roof Walnut, CA
Rv Rubber Roof Maintenance Walnut, CA
Rv Roof Repair Fiberglass Walnut, CA
Rv Roof Leak Repair Near Me Walnut, CA
Repair Rv Roof Walnut, CA
Rv Trailer Roof Repair Walnut, CA
Rv Rubber Roof Replacement Walnut, CA
Rubber Roofing For Campers Walnut, CA
Replace Rv Roof Walnut, CA
Rv Roof Repair Service Near Me Walnut, CA
Rv Rubber Roof Maintenance Walnut, CA
Resealing Rv Roof Walnut, CA
Rv Trailer Roof Repair Walnut, CA
Rv Roof Repair Near Me Walnut, CA
Rv Rubber Roof Repair Walnut, CA
Repair Rv Roof Walnut, CA
Rubber Roofing For Campers Walnut, CA
Rv Roof Replacement Walnut, CA
Rubber Roofing For Campers Walnut, CA
Roof Repair For Rv Walnut, CA
Rubber Roofing For Rv Walnut, CA
Motorhome Roof Replacement Walnut, CA
Rubber Roof For Rv Walnut, CA
Rv Roof Leak Repair Near Me Walnut, CA
Rv Roof Repair Fiberglass Walnut, CA
Rv Fiberglass Roof Repair Walnut, CA
Rv Rubber Roof Maintenance Walnut, CA
Rv Roof Replacement Walnut, CA
Rv Rubber Roof Replacement Walnut, CA
Rv Roof Replacement Walnut, CA
Rv Rubber Roof Maintenance Walnut, CA
Rv Roof Leak Repair Walnut, CA
Rv Roof Leak Repair Walnut, CA
Rubber Roofing For Campers Walnut, CA
Rv Rubber Roof Replacement Cost Walnut, CA
Repair Rv Roof Walnut, CA
Repair Rv Roof Walnut, CA
Rv Rubber Roof Repair Walnut, CA
Repair Rv Roof Walnut, CA
Rv Fiberglass Roof Repair Walnut, CA
Rv Roof Repair Near Me Walnut, CA
Class C Rv Roof Repair Walnut, CA
Best Rv Roof Repair Walnut, CA
Rv Rubber Roof Maintenance Walnut, CA
Rubber Roofing For Campers Walnut, CA
Motorhome Roof Replacement Walnut, CA
Repair Rv Roof Leak Walnut, CA
Rv Trailer Roof Repair Walnut, CA
Rv Rubber Roof Replacement Cost Walnut, CA
Near Me Seo Consultant Walnut, CA
Find A Good Seo Company Walnut, CA
Rv Roof Leak Repair Walnut, CA
OCRV Center
Table of Contents
- – Resealing Rv Roof Walnut, CA
- – OCRV Center
- – Rv Roof Repair Fiberglass Walnut, CA
- – Roof Repair For Rv Walnut, CA
- – Rv Roof Repair Service Near Me Walnut, CA
- – Rv Roof Leak Repair Walnut, CA
- – Rubber Roof For Camper Walnut, CA
- – Rv Roof Repair Walnut, CA
- – Rv Slide Out Roof Repair Walnut, CA
- – Rv Roof Replacement Walnut, CA
- – Replace Rv Roof Walnut, CA
- – Resealing Rv Roof Walnut, CA
- – Class C Rv Roof Repair Walnut, CA
- – Rubber Roof For Camper Walnut, CA
- – OCRV Center
Latest Posts
Health Insurance Plans For Family Laguna Hills
Employee Benefits Outsourcing Companies Orange County
Laguna Woods Church Payroll Services
More
Latest Posts
Health Insurance Plans For Family Laguna Hills
Employee Benefits Outsourcing Companies Orange County
Laguna Woods Church Payroll Services